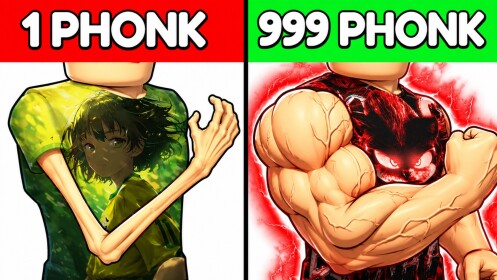
Stage 1 sign
Fan guideRecommended Aura 1
The first stage asks for essentially no Aura — clear it in your first minutes.
The reference for everything you buy, equip and stand on: the named Evolution catalog, the Wins pricing model, the pad label system, and the tests that prove a form is actually working.
Your "build" is a single character wearing one equipped Evolution, standing on the best pad its Rebirth count allows. Wins buy forms; the Evolve panel prices each tier in Wins and names its multiplier (the recorded Tier 2 row: 0/1 Wins Required, x1.1); pads add their own labeled rate (the first: x1.5 Aura at 0 Rebirths). All values on this page were re-checked 2026-10-03.
The names above come from the fan guide's community index (checked 2026-10-03). The game itself has no public cost, order or multiplier table — the Evolve panel in your own server is the only complete list, and its rows name each tier's Wins price and multiplier.
| Form | What the record says |
|---|---|
| Shadow | Named in the fan guide's community index; tier and cost live on the in-game Evolve panel. |
| Montagem Miau | Phonk-track naming; treat the in-game multiplier as the live value. |
| Sakura | Named in the community index; equipping it is a separate step from owning it. |
| Batdaa | Named in the community index; test one Aura tick after equipping. |
| Brazilian Master | Named in the community index; Wins-funded like the other standard forms. |
| Gozalo | Named in the community index; higher tiers sit behind more Wins. |
| Abiis | Named in the community index; the deepest named form at the October 3 check. |
Source: 1phonkevolution.wiki community index (article dated September 6, 2026) — checked 2026-10-03. Costs, tier order and per-form multipliers are shown only in the in-game Evolve panel.
Each is a label the game itself displays; the source column names who read it.
Recommended Aura 1
The first stage asks for essentially no Aura — clear it in your first minutes.
Recommended Aura 80
A short first training goal: a few Treadmill sessions cover it.
0/1 Wins Required, x1.1 multiplier
One Win funds the first upgrade tier, and the panel names the multiplier itself.
0 Rebirth x1.5 Aura
The pad label names a 0-Rebirth entry requirement and a 1.5x Aura training rate.
The three-step rule that every form decision follows, per the fan guide's progression articles.
A form is worth buying when its panel row is affordable from Wins you can farm at a comfortable pace — the first tier costs a single Win, and each later tier scales from there. Fund one tier at a time: the multiplier applies everywhere (clicking, Treadmills, pads), so one equipped upgrade raises every future session, while Wins spread thin across locked tiers raise nothing.
Ownership and equipment are separate states, and the game will happily let you own a strong form while wearing a weak one. After every purchase, open the Evolve panel, select the row to equip it, and confirm the selection stuck before you leave the menu.
Take one training tick at the same spot before and after the equip and compare the counters. The recorded x1.1 at Tier 2 means a 100-Aura tick becomes a 110-Aura tick; if your counter shows nothing, the form is not equipped (or the row is a different tier than you thought). The same test gates Limited Auras and pad swaps — visuals and rarity prove nothing that a tick cannot.
Said plainly, because a wiki that invents numbers is worse than one that admits gaps.
No per-form stat table, no tier order, and no Wins price list beyond the recorded Tier 2 row exist here, because Paint n Relax ships no external data and no source has published a complete reading. The same applies to pad rates above the first: the x1.5 label at 0 Rebirths is documented, the rest are printed in-game only. If a site quotes a full stat table for this game, check it against your own Evolve panel before trusting it — and if the two disagree, send us the panel screenshot via the contact page.
The fan guide's community index names seven standard forms — Shadow, Montagem Miau, Sakura, Batdaa, Brazilian Master, Gozalo and Abiis — funded with Wins and equipped from the Evolve panel. The panel in your own server is the complete, current list: the developer ships no external roster, so new forms appear there first.
Each tier's price is printed on its own Evolve panel row in Wins — the recorded Tier 2 row reads 0/1 Wins Required. Costs for the deeper tiers live only in-game; no source has published a full price table, and this page will not invent one.
Because buying and equipping are separate actions. Select the form in the Evolve panel to equip it, then run the one-tick test: one training tick before versus after at the same spot. If your Aura counter did not move, the equip did not take — reselect the row and check it again.
They are training surfaces gated by Rebirth count, and they print their own requirement and multiplier — the first is labeled "0 Rebirth x1.5 Aura". Read the label as a job posting: it tells you the Rebirth count you need and the Aura rate you get, and the label in your server outranks any older number anywhere online.
Test first, then decide. The fan guide documents the Limited lane (timed offers, daily rewards, crates or a Robux lane) and warns that a rare appearance does not guarantee a stronger effect — equip it, take one Aura tick, and compare. A cosmetic result is a real possibility.