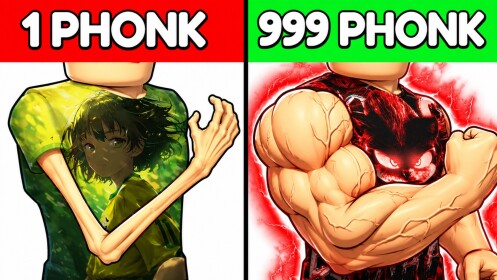
Aura
OfficialThe core power stat. You gain it by clicking, by training on Treadmills, and through pad and Evolution multipliers. The official description leads with it: "Click to gain Aura!"
Two resources drive everything — Aura opens the gates, Wins buy the Evolutions. This worksheet turns the numbers the game already shows you into a session plan.
Every currency in the game feeds the same loop, attributed to the source that documents it.
The core power stat. You gain it by clicking, by training on Treadmills, and through pad and Evolution multipliers. The official description leads with it: "Click to gain Aura!"
The stage-reward currency. Wins drop from cleared stages and unlock Evolution forms — the official description ties the two together directly.
Training pads keyed to your Rebirth count. The first pad is labeled "0 Rebirth x1.5 Aura" in the fan guide's Treadmill walkthrough, so the pad names its own Rebirth requirement and Aura multiplier on the label.
Buyable forms funded by Wins. The Evolve panel shows a Wins requirement per tier (the fan guide's recorded Tier 2 row reads 0/1 Wins Required with a x1.1 multiplier), and the form must then be equipped to take effect.
A parallel acquisition track documented by the fan guide — timed offers, daily rewards, crates or a Robux lane. Its guidance: a rarer-looking Aura is not automatically stronger, so test one Aura tick before and after equipping.
The game prints its rates on pads, signs and panels; the worksheet only multiplies them by your own measurements.
Aura per hour = Aura per tick × ticks per minute × 60 × pad multiplier. The multiplier is not a guess: the first Phonk pad's own label reads "0 Rebirth x1.5 Aura", and pads for higher Rebirth counts print their own. If one tick pays 100 Aura and you get 20 ticks a minute on the x1.5 pad, that is 100 × 20 × 60 × 1.5 = 180,000 Aura per hour of training.
Minutes to target = target Aura ÷ (Aura per hour ÷ 60). The target comes from the stage sign you are aiming at — the World 1 route's first two signs read recommended Aura 1 and 80, and each later sign scales up. At the rate above, an 18,000-Aura gate costs exactly 6 minutes of training, which is why the fan guide pushes short test loops over open-ended grinding: you either reach the gate this session or you need a better multiplier first.
Wins per hour = (Wins per clear × 60) ÷ minutes per clear. The recorded Tier 2 row on the Evolve panel prices the first upgrade at 0/1 Wins Required, so at a comfortable 4-minute clear you fund your first Evolution in one run. If your clear pace collapses on a harder stage, drop back: a stage you finish twice as fast pays more Wins per hour than one you barely survive, and the fan guide's farming advice is exactly this — bank easy Wins, then advance.
Every value below is yours to enter from the game — nothing here is a game statistic. Time one training tick with a stopwatch, count ticks for 60 seconds, and read the pad label for the multiplier.
Compare the first two boxes against the stage sign you are aiming for, and the third box against the Evolve panel's Wins price. If a stage's reward per hour beats training, go clear it — if training wins, stay on the pad until the next gate falls.
A plan that survives contact with the game is worth more than a precise estimate.
Re-measure after every change, because your rate is a moving number: equipping an Evolution raises it (the recorded Tier 2 row carries a x1.1 multiplier), a higher pad raises it again, and a Rebirth changes which pads you qualify for. The comparison habit from the training guide takes two minutes: one tick before the change, one tick after, same spot — if the counter did not move, the change did not apply, and the fix is usually the separate equip step rather than more grinding.
Budget around the gates, not the clock. If the worksheet says your next stage sign is 10 minutes away, do them as one focused training block and spend the rest of the session banking Wins from a stage you already clear comfortably. If the sign is more than an hour away, the efficient move is usually not more time — it is the next Evolution tier, the next pad, or (once the panel confirms it on your server) a Rebirth, which is exactly the trade the rebirth guide walks through. Carry the same skepticism to reward rumors: with no code system shipped (tracker checks on September 7 and 26, 2026 found none) and no published drop tables, a session plan built on your own measured numbers is the only one that cannot be wrong.
From you. The game publishes its multipliers and gates on labels — pad tags like "0 Rebirth x1.5 Aura", stage signs, and the Evolve panel's Wins rows — so the worksheet asks for your measured Aura per tick, your tick rate, and the label multiplier, then does the arithmetic. No number in it is a site-side claim about game rates.
Stand fully on the training surface, note your Aura counter, train exactly once, and read the gain. Repeat three times and keep the middle value — that filters out a mis-tap or a lag spike. The fan guide's comparison method is the same idea: one tick here, one tick there, keep the bigger surface.
The recommended-Aura number on the sign of the next stage you want to clear — the first two stages read 1 and 80 in the fan guide's World 1 route, and later signs scale up from there. Aim at a gate you can actually clear, not the biggest number on the map.
Whichever your next unlock needs. Evolutions are priced in Wins on the Evolve panel, and Aura opens the stages that pay those Wins, so the loop alternates: train to the next sign's value, clear it, bank the Win, buy and equip the next tier, and repeat. The worksheet's Wins-per-hour box tells you when a clear is worth more than another training block.
There are no codes yet — the game has no code system as of the 2026-10-03 check (confirmed by trackers on September 7 and 26, 2026). If Paint n Relax adds one, a boost window changes the answer immediately: farm during the multiplier, not before it.